Feeling that little pang of anxiety when you leave your home unguarded? You’re not alone. In today’s world, having an extra set of eyes on your property isn’t a luxury; it’s a smart, proactive step towards genuine peace of mind. But buying a camera is only half the battle. Knowing How To Install Home Camera Outdoor Safely is what turns a piece of tech into a powerful security shield. It’s about more than just screwing a camera to a wall; it’s about strategic placement, secure connections, and ensuring your system is as resilient as the sense of security it provides.
Let’s be honest, the thought of drilling into your home and dealing with wiring can be daunting. But trust me, with the right guidance, it’s a project you can absolutely tackle. As a Senior Security Solutions expert at Family Security 247, I’ve helped countless homeowners go from confused to confident. This guide is my way of sitting down with you, coffee in hand, to walk you through the entire process, ensuring you get it right the first time.
Why a Proper Outdoor Camera Installation Matters
Before we grab the toolbox, let’s talk about the “why.” A poorly installed camera is, at best, an unreliable witness and, at worst, a complete waste of money. A proper, safe installation ensures:
- Maximum Coverage: You’ll eliminate blind spots where intruders could hide.
- Deterrence: A visibly and professionally installed camera is a powerful deterrent. It tells potential wrongdoers, “This home is protected.”
- Weather Resistance: The great outdoors is harsh. A safe installation protects your camera from rain, wind, and extreme temperatures, ensuring it works when you need it most.
- Reliability: A secure power and network connection means your camera won’t fail you during a critical moment.
Before You Drill: The Pre-Installation Checklist
Success loves preparation. Before you even think about drilling a hole, run through this essential checklist. This planning phase is the secret to a smooth and effective installation.
- Choose the Right Camera: Not all cameras are built for the outdoors. Look for an IP rating (Ingress Protection) of at least IP65. This means it’s dust-tight and can withstand jets of water, like heavy rain. For more on this, check out our guide on [choosing the best weatherproof cameras].
- Plan Your Placement: Walk around your property. Where are the most vulnerable spots? Think like a burglar. Key areas typically include:
- Front and back doors
- Off-street windows
- Driveways and garages
- Side gates or yards
- Check Your Wi-Fi Signal: If you’re using a Wi-Fi camera, take your smartphone to the exact spot you plan to mount the camera. Do you have at least two or three bars of Wi-Fi? A weak signal means unreliable video feeds. If it’s weak, you may need a [Wi-Fi extender].
- Gather Your Tools: Nothing’s more frustrating than being halfway up a ladder and realizing you’re missing a tool. You’ll likely need:
- A power drill with various bits
- The camera and its mounting hardware
- A ladder
- Screwdrivers
- Pencil for marking
- Level
- Weatherproof silicone sealant
- Cable clips
The Main Event: How to Install Home Camera Outdoor Safely
Alright, you’ve done your homework. Now it’s time for the main event. We’ll break this down into simple, manageable steps.
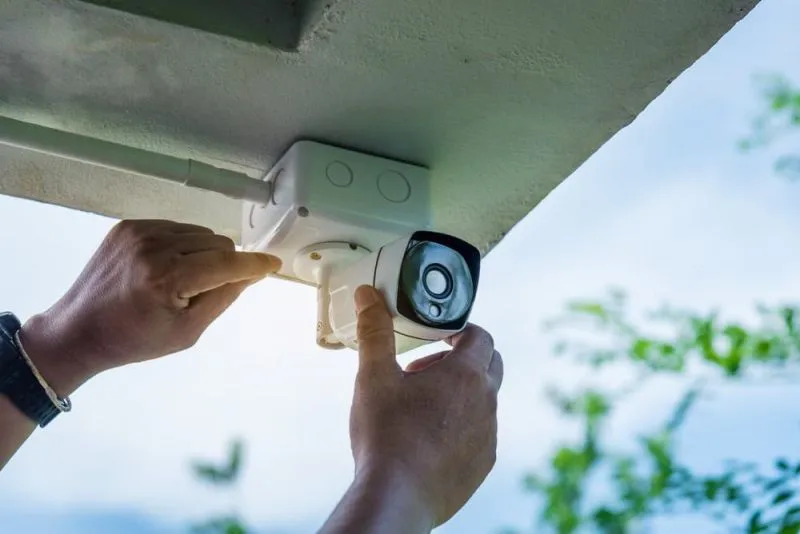
Step 1: Find the Perfect Height and Angle
The placement of your camera is crucial. Here are the golden rules:
- Go High: Mount the camera about 8-10 feet (around 3 meters) off the ground. This is high enough to get a good overview of the area but, more importantly, keeps it out of easy reach for vandals or thieves.
- Angle Down: Point the camera slightly downwards. This helps capture faces more clearly and reduces sky glare, which can mess with the image quality. Avoid pointing it directly at the sun.
- Use the Live View: Before you drill permanent holes, have someone hold the camera in the proposed spot while you check the live video feed on your phone. Does it cover everything you want it to? Adjust until the view is perfect, then mark the drill holes with your pencil.
Step 2: The Power Play – Wiring vs. Wire-Free
This is where many people get nervous, but it’s straightforward if you know your options. How you get power to your camera is a critical part of a safe outdoor camera installation.
For Wired Cameras (PoE or DC Power)
Wired cameras offer the most reliable connection. You’ll need to drill a hole through your exterior wall to run the cable inside.
- Drill Smart: Choose a spot for your hole that is inconspicuous and leads to an accessible interior area, like a garage or attic. Before drilling, check for electrical wires and pipes inside the wall. Drill a small pilot hole first.
- The Upward Angle: Always drill the hole from the outside in, with a slight upward angle. This clever little trick creates a natural slope that prevents rainwater from running down the cable and into your home.
- Feed and Seal: Run the power and/or ethernet cable through the hole. Once everything is connected, seal the hole on both the inside and outside with weatherproof silicone sealant. This prevents drafts, moisture, and pests from getting in.
A Word of Caution: If your camera requires a connection to mains electricity and you’re not 100% confident, please hire a qualified electrician. Your safety is always priority number one.
For Wireless (Battery or Solar-Powered) Cameras
This is a much simpler approach to how to install home camera outdoor safely as it removes the need for drilling large holes for cables.
- Secure the Mount: Even though there are no power cables, you still need to securely attach the mounting bracket to the wall. Use the screws and wall anchors that came with your camera.
- Consider Accessibility: Remember that you’ll need to access the camera to recharge the battery every few months. Don’t place it somewhere that requires a death-defying ladder climb each time.
- Solar Panel Placement: If you’re using a solar panel, ensure it’s positioned to receive several hours of direct sunlight each day.
Step 3: Connect, Configure, and Test
You’re on the home stretch! With the camera mounted and powered, the final steps are digital.
- Follow the App Instructions: Every camera brand has a dedicated app. Download it and follow the step-by-step instructions to connect the camera to your Wi-Fi network and account.
- Configure Your Settings: This is where you customize your security. Set up motion detection zones to avoid false alerts from swaying trees or passing cars. Adjust notification settings so you’re alerted to what matters.
- Test Everything: Trigger the motion detection by walking in front of the camera. Check the live feed. Test the two-way audio. Make sure everything is working perfectly before you put the ladder away.
As our in-house cybersecurity expert, Dr. Adrian Foster, always says:
“Your security camera is only as secure as the network it’s on. Always change the default password on your camera during setup and use a strong, unique password for your Wi-Fi network. It’s the digital lock on your front door.”
Frequently Asked Questions (FAQ)
Q: How high should I mount my outdoor security camera?
A: The ideal height is 8-10 feet (about 3 meters) from the ground. This provides a good vantage point while keeping the camera out of easy reach of anyone trying to tamper with it.
Q: Can I install an outdoor camera without drilling?
A: Yes, there are options like no-drill mounts that use tension or adhesive, which are great for renters. However, for the most secure and permanent installation, especially in areas with harsh weather, drilling and screwing the mount to the wall is recommended.
Q: Do all outdoor cameras need Wi-Fi to work?
A: Most modern DIY cameras require Wi-Fi to send video to your phone and the cloud. However, some wired systems (like PoE systems) record to a local NVR (Network Video Recorder) and can operate without an internet connection, though you’d lose remote viewing capabilities.
Q: How do I protect my outdoor camera from being stolen?
A: Mounting it high up is the first line of defense. Additionally, some cameras come with anti-theft mounts or security tethers. Using a camera that records to the cloud also ensures that even if the camera is stolen, your footage is safely stored elsewhere.
Q: Is it legal to have a security camera pointing at the street?
A: Laws vary by location, but generally, it is legal to record video in public spaces from your property, including the street and sidewalk. However, it’s crucial to respect your neighbors’ privacy. Avoid pointing your camera directly into their homes, windows, or private yards. Recording audio is often more legally restricted than video.
Your Home, Now Safer and Smarter
Congratulations! You’ve moved beyond just thinking about home security and have taken a real, tangible step to protect your family and property. By following these steps on how to install home camera outdoor safely, you haven’t just put up a camera; you’ve installed a system you can rely on. You’ve ensured it will withstand the elements, deter intruders, and provide clear evidence if you ever need it.
That feeling of being able to check in on your home from anywhere in the world isn’t just about technology; it’s about reclaiming your peace of mind. Now you’re equipped with the knowledge to make a smart, safe choice for your home’s security.